
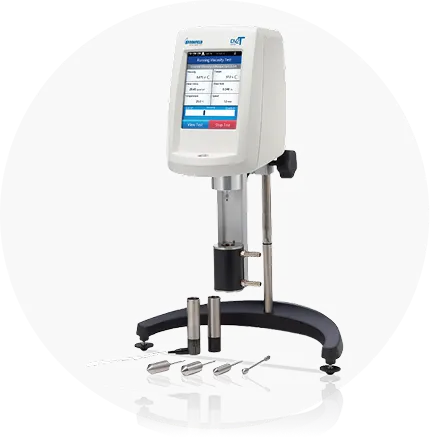
Brookfield viscometers are the gold standard for viscosity measurement across pharmaceutical, food, paint, cosmetic, and petrochemical industries. To ensure accurate and reliable readings, every Brookfield viscometer — whether DV-I, DV-II, DV-III, DV2T, or DV3T — must be calibrated at defined intervals.
This blog walks you through the complete Brookfield viscometer calibration procedure as performed by NABL-accredited laboratories.
What Is Brookfield Viscometer Calibration?
Brookfield viscometer calibration is the systematic process of verifying and adjusting the instrument’s torque, RPM, temperature, and viscosity readings against certified reference standards. The objective is to confirm that the instrument measures viscosity within the manufacturer’s stated accuracy — typically ±1% of the full-scale range and ±0.2% repeatability.
Equipment and Standards Required
Before starting the calibration, the following are typically used:
Certified standard viscosity oils traceable to NIST or NPL A calibrated digital thermometer or RTD probe
A water bath or temperature controller (usually maintained at 25°C ± 0.1°C)
Appropriate spindles (LV, RV, HA, HB sets) Spindle guard leg (where applicable)
A vibration-free, level workbench
A calibrated tachometer (for RPM verification)
Step-by-Step Brookfield Viscometer Calibration Procedure
Step 1: Visual Inspection
Begin with a thorough visual check of the instrument and accessorie
- Inspect the viscometer body for damage or corrosion
2. Check spindles for bending, scratches, or wear marks
3. Verify the spindle coupling nut and threads are clean and undamaged
4. Confirm the guard leg is straight and properly attached
5. Ensure the display, keypad, and connectors are functional
Any visible defect must be recorded and addressed before calibration proceeds.
Step 2: Levelling the Instrument
Place the viscometer on a stable, vibration-free surface. Use the built-in bubble level on the top of the unit and adjust the levelling screws on the stand until the bubble is perfectly centred. An unlevel viscometer will produce systematic errors in all readings.
Step 3: Spindle Checking
Each spindle is inspected for:
- Dimensional accuracy – diameter, length, and immersion mark
2. Surface condition – no pitting, scratches, or product residue
3. Straightness – verified using a dial gauge or straight edge
Spindle factors are unique to each spindle-RPM combination, and using the wrong or damaged spindle is one of the most common sources of viscosity error.
Step 4: Temperature Verification
Temperature has a major effect on viscosity — for many fluids, a 1°C change can alter viscosity by 2–10%. The calibration is therefore performed at a controlled temperature, usually 25°C.
- Place the standard oil in a temperature-controlled bath
2. Allow it to equilibrate for at least 30 minutes
3. Verify the actual temperature with a calibrated reference thermometer
4. Record the exact temperature on the calibration sheet
Step 5: RPM (Rotational Speed) Verification
Using a calibrated tachometer or stroboscope, the actual rotational speed of the spindle is measured at multiple set RPMs (typically 0.5, 1, 5, 10, 20, 50, and 100 RPM). The measured value is compared against the displayed value, and the deviation must fall within the manufacturer’s specification.
Step 6: Torque Verification
A certified torque calibration kit or master spindle is used to verify the torque sensor across its range — usually at 10%, 50%, and 100% of full-scale torque. Torque accuracy is the heart of viscometer accuracy.
Step 7: Viscosity Verification Using Standard Oils
This is the most important step. Multiple certified standard viscosity oils — covering low, mid, and high ranges of the instrument’s working range — are used.
Procedure:
1. Pour the standard oil into a clean 600 ml beaker (or appropriate container)
2. Bring it to the calibration temperature
3. Select the correct spindle and RPM combination
4. Immerse the spindle to the immersion mark, avoiding air bubbles
5. Allow the reading to stabilise (typically 30–60 seconds)
6. Record the displayed viscosity (cP) and torque (%)
7. Repeat for each oil, RPM, and spindle combination per the calibration plan
The measured viscosity is then compared with the certified value of the standard oil. The deviation must be within the acceptance criteria — typically ±1% of full-scale range.
Step 8: Repeatability Check
The same measurement is repeated 3–5 times to verify repeatability. Brookfield specifies repeatability of ±0.2%, and any deviation beyond this triggers further investigation.
Step 9: Documentation and Certificate Issuance
Once all checks are complete, a NABL-accredited calibration certificate is issued, containing:
1. Instrument details (make, model, serial number)
2. Standards used and their traceability
3. Environmental conditions (temperature, humidity)
4. Measured values, reference values, and deviations
5. Measurement uncertainty for each point
6. Calibration date and due date
7. Signature of the authorised signatory
Common Issues Found During Brookfield Calibration
- Worn or bent spindles giving low readings
2. Incorrect RPM due to motor wear
3. Torque drift in older instruments
4. Temperature instability in the sample bath
5. Air bubbles trapped under the spindle disc
6. Improper immersion depth
A skilled calibration engineer identifies and addresses these issues during the calibration visit.
Final Thoughts
The Brookfield viscometer calibration procedure is detailed, systematic, and requires certified standards along with skilled engineers. Cutting corners — using uncertified oils, skipping temperature control, or ignoring spindle checks — leads to false confidence in your readings and serious audit risks.
Looking for an expert NABL-accredited Brookfield viscometer calibration service? Our experienced engineers offer on-site and in-lab calibration with full documentation and traceability. Get in touch for a quote today.