
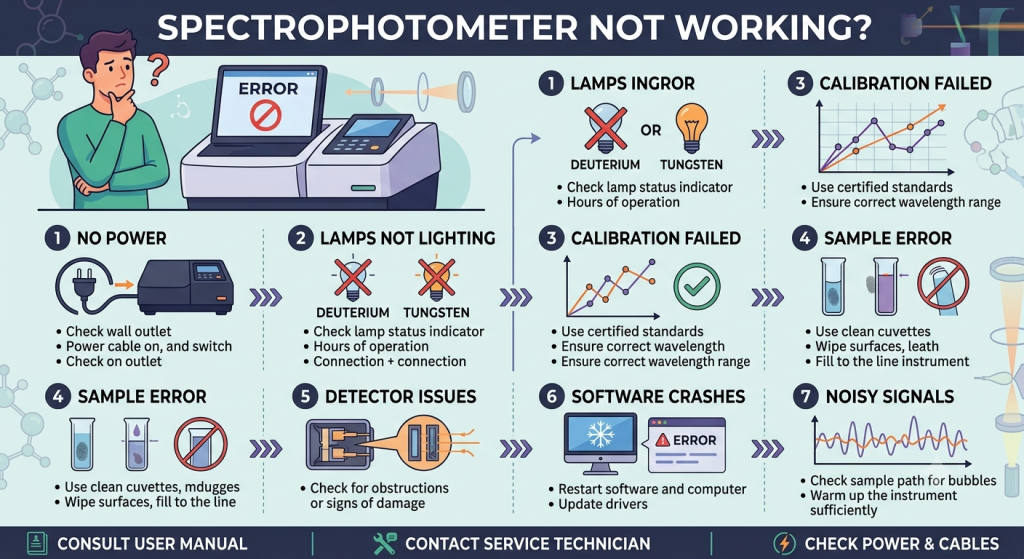
1. The Instrument Won’t Turn On or Initialize
If the instrument is completely dead, or if it powers up but fails its initial self-test, look at the fundamental infrastructure first.
Power Supply and Fuses: Check that the power cord is securely plugged into both the unit and the wall outlet. Test the outlet with another device. Check the instrument’s main fuse (usually located next to the power switch or cord inlet); a blown fuse is an easy, inexpensive fix.
Communication Errors: If the spectrophotometer turns on but won’t interface with your PC software, disconnect and reconnect the USB or serial communication cables. Restart both the computer and the spectrophotometer in the sequence recommended by the manufacturer (typically, turn the instrument on first, wait for initialization, then launch the software)
2. Severe Baseline Drift or Unstable Readings
If your absorbance values fluctuate wildly while measuring a static sample, or if the baseline drifts consistently over time, the issue is almost always optical or thermal.
The Source Lamps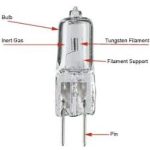
Most UV-Vis spectrophotometers use two lamps: a
deuterium lamp for the UV range (190–350 nm) and a tungsten/halogen lamp for the visible range (350–1100 nm). Lamps have finite lifespans (typically 1,000
to 2,000 hours). If a lamp is nearing the end of its life, its intensity becomes unstable, leading to excessive signal noise. Check the lamp hours in your software.
Furthermore, these lamps require a warm-up period. If you try to run assays within 5 minutes of flipping the power switch,you will experience natural baseline drift. Give the instrument at least 15 to 30 minutes to achieve thermal equilibrium.
 Safety Warning: Never look directly at an illuminated UV light source (deuterium lamp). UV radiation can cause permanent retinal damage. Always turn off the instrument and let the lamp cool down completely before attempting an inspection or replacement.
3. Absorbance Values Are Unexpectedly High or Low
When the machine operates normally but yields results that mismatch your expectations, look closely at sample handling and optics.
Cuvette Selection and Orientation
This is the single most common cause of user-error in spectrophotometry. Standard plastic or disposable glass cuvettes absorb strongly in the UV spectrum (below 340 nm). If you attempt to measure a sample at 260 nm using a standard polystyrene cuvette, the light will be completely blocked, resulting in an artificially high or saturated absorbance value. For UV wavelengths, you must use quartz cuvettes.
Additionally, confirm that the clear windows of the cuvette are perfectly aligned with the instrument’s light path. Placing a cuvette with its frosted side facing the beam will instantly distort your data.
Contamination and Path Blockage
Fingerprints, smudges, or dust particles on the exterior windows of the cuvette reflect and scatter light. Always wipe the optical surfaces down with lint-free lens paper and a drop of spectrophotometric-grade ethanol or isopropanol before inserting them into the sample holder. Inside the sample compartment, make sure nothing is obstructing the optical path, such as spilled solution or misaligned multi-cell holders.